webpack 设置代理
proxy:{
  // '/api/**': {
  '/api': {
            target: 'http://localhost:8080', // 可以请求本地接口 也可以是线上接口
            //secure: false,      // 如果是https接口,需要配置这个参数
            changeOrigin: true,     // 如果接口跨域,需要进行这个参数配置
            pathRewrite: {
              '^/api': ''
            }
        },

'/api-dev/**': {
        target: 'http://localhost:8080',
        changeOrigin: true,
        secure: true,
        pathRewrite: {
          "^/api-dev": ""
        }
      },
}

如 请求`/api-dev/fileupload/123`
就会变成 请求 `/fileupload/123`的接口
`/fileupload/123` 要在代理的服务其中可以接受访问。
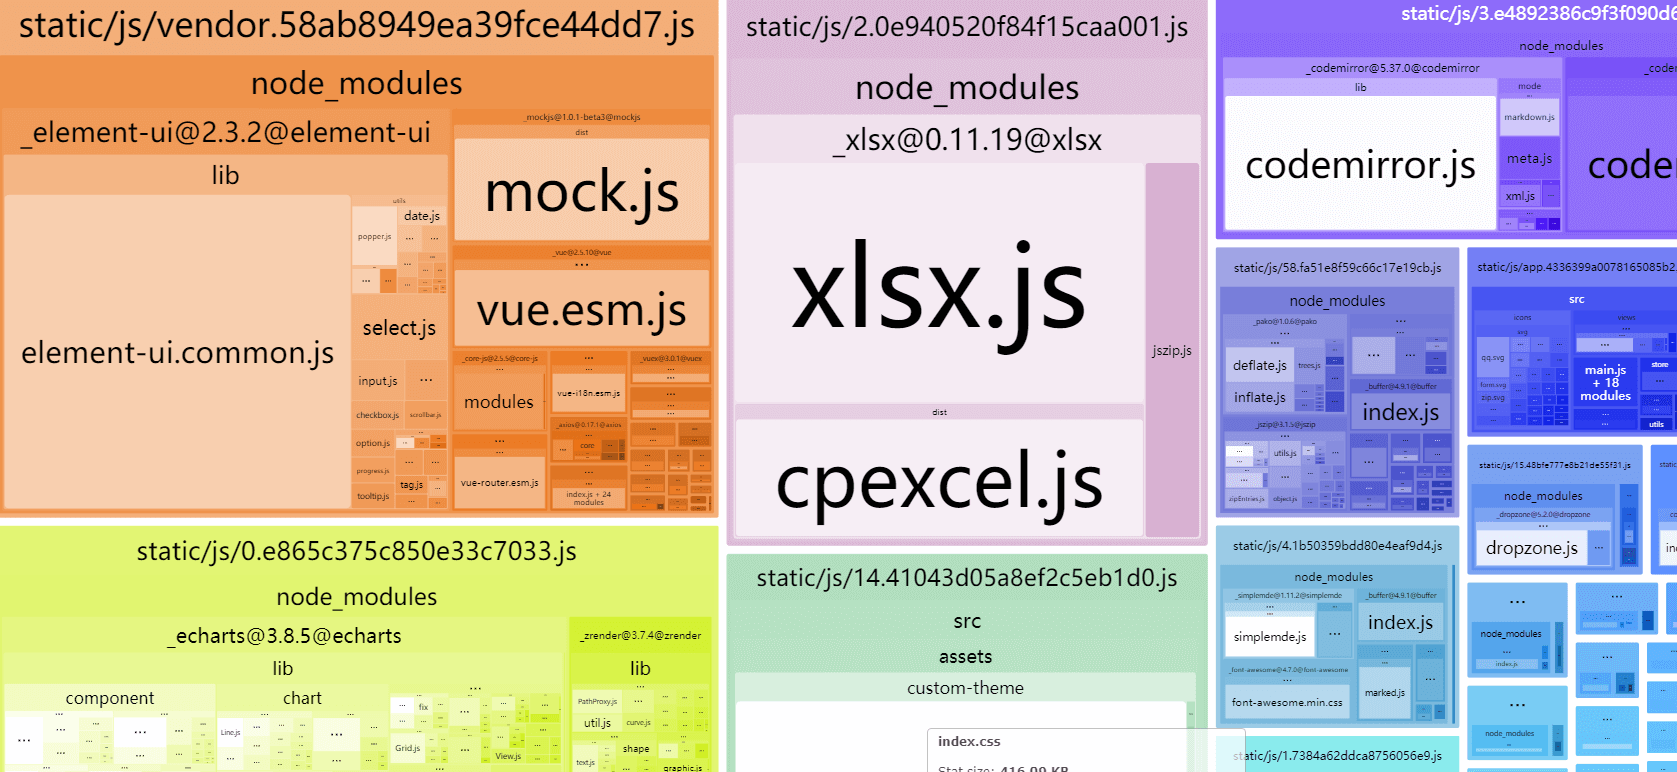
性能优化 - 可视化查看webpack 打包后所有的依赖关系
查看 webpack 打包后所有组件与组件间的依赖关系,针对多余的包文件过大,剔除首次影响加载的效率问题进行剔除修改

- 能看到文件打包后的大小
- 还能预览到文件gzip后的大小 gzip 基本压缩一半
按照和使用
npm install --save-dev webpack-bundle-analyzer
const BundleAnalyzerPlugin = require('webpack-bundle-analyzer').BundleAnalyzerPlugin;

module.exports = {
  plugins: [
    new BundleAnalyzerPlugin()
  ]
}


··············
or

if (config.build.bundleAnalyzerReport) {
  const BundleAnalyzerPlugin = require('webpack-bundle-analyzer').BundleAnalyzerPlugin
  webpackConfig.plugins.push(new BundleAnalyzerPlugin())
}
==BundleAnalyzerPlugin== 构造函数可以采用默认的可选配置对象:
new BundleAnalyzerPlugin({
  //  可以是`server`,`static`或`disabled`。
  //  在`server`模式下,分析器将启动HTTP服务器来显示软件包报告。
  //  在“静态”模式下,会生成带有报告的单个HTML文件。
  //  在`disabled`模式下,你可以使用这个插件来将`generateStatsFile`设置为`true`来生成Webpack Stats JSON文件。
  analyzerMode: 'server',
  //  将在“服务器”模式下使用的主机启动HTTP服务器。
  analyzerHost: '127.0.0.1',
  //  将在“服务器”模式下使用的端口启动HTTP服务器。
  analyzerPort: 8888,
  //  路径捆绑,将在`static`模式下生成的报告文件。
  //  相对于捆绑输出目录。
  reportFilename: 'report.html',
  //  模块大小默认显示在报告中。
  //  应该是`stat`,`parsed`或者`gzip`中的一个。
  //  有关更多信息,请参见“定义”一节。
  defaultSizes: 'parsed',
  //  在默认浏览器中自动打开报告
  openAnalyzer: true,
  //  如果为true,则Webpack Stats JSON文件将在bundle输出目录中生成
  generateStatsFile: false,
  //  如果`generateStatsFile`为`true`,将会生成Webpack Stats JSON文件的名字。
  //  相对于捆绑输出目录。
  statsFilename: 'stats.json',
  //  stats.toJson()方法的选项。
  //  例如,您可以使用`source:false`选项排除统计文件中模块的来源。
  //  在这里查看更多选项:https:  //github.com/webpack/webpack/blob/webpack-1/lib/Stats.js#L21
  statsOptions: null,
  logLevel: 'info' 日志级别。可以是'信息','警告','错误'或'沉默'。
})
vue 进行 gzip压缩和服务器如何开启gzip
使用 vue-cli生成的项目,会自动配好相关的设置。 config/index.js 中
    // Gzip off by default as many popular static hosts such as
    // Surge or Netlify already gzip all static assets for you.
    // Before setting to `true`, make sure to:
    // npm install --save-dev compression-webpack-plugin
    productionGzip: false,  // 设置是否开启gizp
    productionGzipExtensions: ['js', 'css'],
build/webpack.prod.conf.js 中
if (config.build.productionGzip) {
  const CompressionWebpackPlugin = require('compression-webpack-plugin')

  webpackConfig.plugins.push(
    new CompressionWebpackPlugin({
      asset: '[path].gz[query]',
      algorithm: 'gzip',
      test: new RegExp(
        '\\.(' +
        config.build.productionGzipExtensions.join('|') +
        ')$'
      ),
      threshold: 10240,
      minRatio: 0.8
    })
  )
}
自动打开浏览器
npm 按照 opn 包。
npm-opn
opn('http://sindresorhus.com');
var opn = require('opn')
...

module.exports = app.listen(port, function (err) {
  if (err) {
    console.log(err)
    return
  }

  var uri = 'http://localhost:' + port

  // when env is testing, don't need open it 当环境变量NODE_ENV是testing时,不需要打开它
  if (autoOpenBrowser && process.env.NODE_ENV !== 'testing') {
    opn(uri)
  }
})
如果是手机端,访问localhost:8080访问不了,可以修改为带ip地址,通过node 获取
var os=require('os');
var ifaces=os.networkInterfaces();
var _IPs = [];
for (var dev in ifaces) {
  ifaces[dev].forEach(function(details){
    if (details.family=='IPv4') {
      // console.log(dev,details.address);
      _IPs.push(details.address)
    }
  });
}
// console.log(_IPs);


var uri = 'http://'+_IPs[0]+":" + port;
 opn(uri)
``